You know who you are.

Monday, 1 July 2013
Friday, 7 June 2013
[Hoppie Eats] Simple Chicken and Mushroom Pasta

Hi everyone! I wanted to share this recipe because it's a personal favourite of mine and conveniently, quite easy to make!

Ingredients:
- Pasta
- Chicken breast (filleted or diced)
- Button mushroom (sliced or diced)
- Basil leaves
- White pasta sauce
- Parmesan
- Garlic (crushed or finely cut)
- Butter
- Italian herbs
- Parsley flakes
- Salt


1. Boil the pasta to whatever degree of softness you prefer. I like my pasta quite soft so that'd take about 10-15 minutes over medium heat. I also like to add a pinch of salt and a teaspoon of butter to the pasta while it's cooking. Drain out all the water when done.

2. Next, spread a generous dab of butter over a large pan over medium heat and add the mushroom, chicken and 2 cloves of garlic like so:

3. Stir-fry the pan's contents in their "designated corners" until the mushrooms are dark brown and juicy and you are enveloped by the heavenly scent of frying garlic.
4. Next, add the basil and stir-fry all the contents together for 20 seconds.

5. Reduce the heat and add the pasta, huge dollops of white pasta sauce, a pinch of parmesan, salt, italian herbs and parsley flakes. Roll-up your sleeves and mix all those ingredients together for a minute or so.

6. Remove from heat and serve with a generous sprinkling of parmesan on top. Bon appétit!

Tuesday, 28 May 2013
Vivid Sydney Lighting Festival 2013
26th May, 2013
The festival was quite an underwhelming experience, really.


Saturday, 4 May 2013
Free Comic Book Day and May The 4th Be With You!

I attended the Free Comic Book Day at Kings Comics and I had so much fun! This was my first time doing anything like this.
Like queuing for hours.
Like joining the masses in adoration of fictional characters.
...you know what I mean.

I had planned on taking a bus so I'd arrive at the store by it's opening time 9am but I was offered a lift. I sure am happy that I didn't take the bus because when I arrived at 8:20am, the queue was already looking rather formidable. So for the next 50 minutes, I gawked at cosplayers, read the 2 free comic books and ate the free donuts the staff gave us. Awesome, right?
 |
| Photo credits: Kings Comics Facebook page |
When I finally got into the store, it was pretty crazy. I grabbed 2 more free comics and pottered around the store, looking for the manga section. I promised myself that I'd purchase only one manga but even that was proving difficult since they didn't have the first volumes of most mangas. After some thorough browsing, I finally found Volume 1 of "21st Century Boys" by Naoki Urasawa! I watched "Monster" anime a year back and it was amazing.
And creepy.
And awesome.

After I left the store and escaped the general crazy atmosphere, I crossed the street over to Elizabeth's Bookshops to buy an Asterix comic for my mom. She's a quite a huge fan and owns around 25 titles. I found that Elizabeth's has a good comic collection which includes manga and used comics for cheap prices.
I got down at the wrong bus stop on my way back home (yeah, I went full retard) which meant I had to walk over a kilometer. As I was walking, I spotted an Inspector Lynley novel at a thrift shop so I guess I was lucky...?

All in all, it was a great experience and I'm looking forward to reading the comics!

PS: Here's my OOTD. One of the staff members said my Vote for Pedro was awesome. Aw yeah.

Saturday, 6 April 2013
DIY Dip-Dye Denim Jacket
One of my favourite jackets was starting to look a little careworn so I decided to give it a DIY makeover! In this post, I've outlined the steps taken to achieve the ombre effect.
This is my denim jacket, bought from SES for $20, I think.

You're going to need:
- Bleach
- Fabric dye (I used Fevicryl)
- Warm water
- Patience (or maybe a good book)

First, I put my jacket on a hanger and hung it like so:

Then, I mixed about a cup of bleach with...a whole load of water? That wasn't very helpful.

And let the bleacher games begin! Okay lame, I know.

To achieve a more gradual bleaching, my mother kept adding in more hot water at 15 minute intervals.

Oooh bubbles!

After an hour, take the jacket out the the bleach solution and run it under cold water.

Wring the jacket dry...LIKE A DOTHRAKI WARRIOR!

After the bleaching, it should look a little something like this:

If you're into the whole 90's acid-wash/grunge look, then stop! This is as far as you should go. If you're a hipster (which I'm not, I swear!), then you've still got some more work to do.
Add in the dye. I used up about three quarters of the bottle here.

Next up, warm water!

Swirl it around for a good measure...

Crunch time! Carefully place the hem of the jacket into the dye. Ensure that there is no dye splattered about which can cause spotting.

Remember to add more warm water in 15 minute intervals, just as I did in the bleaching process before.
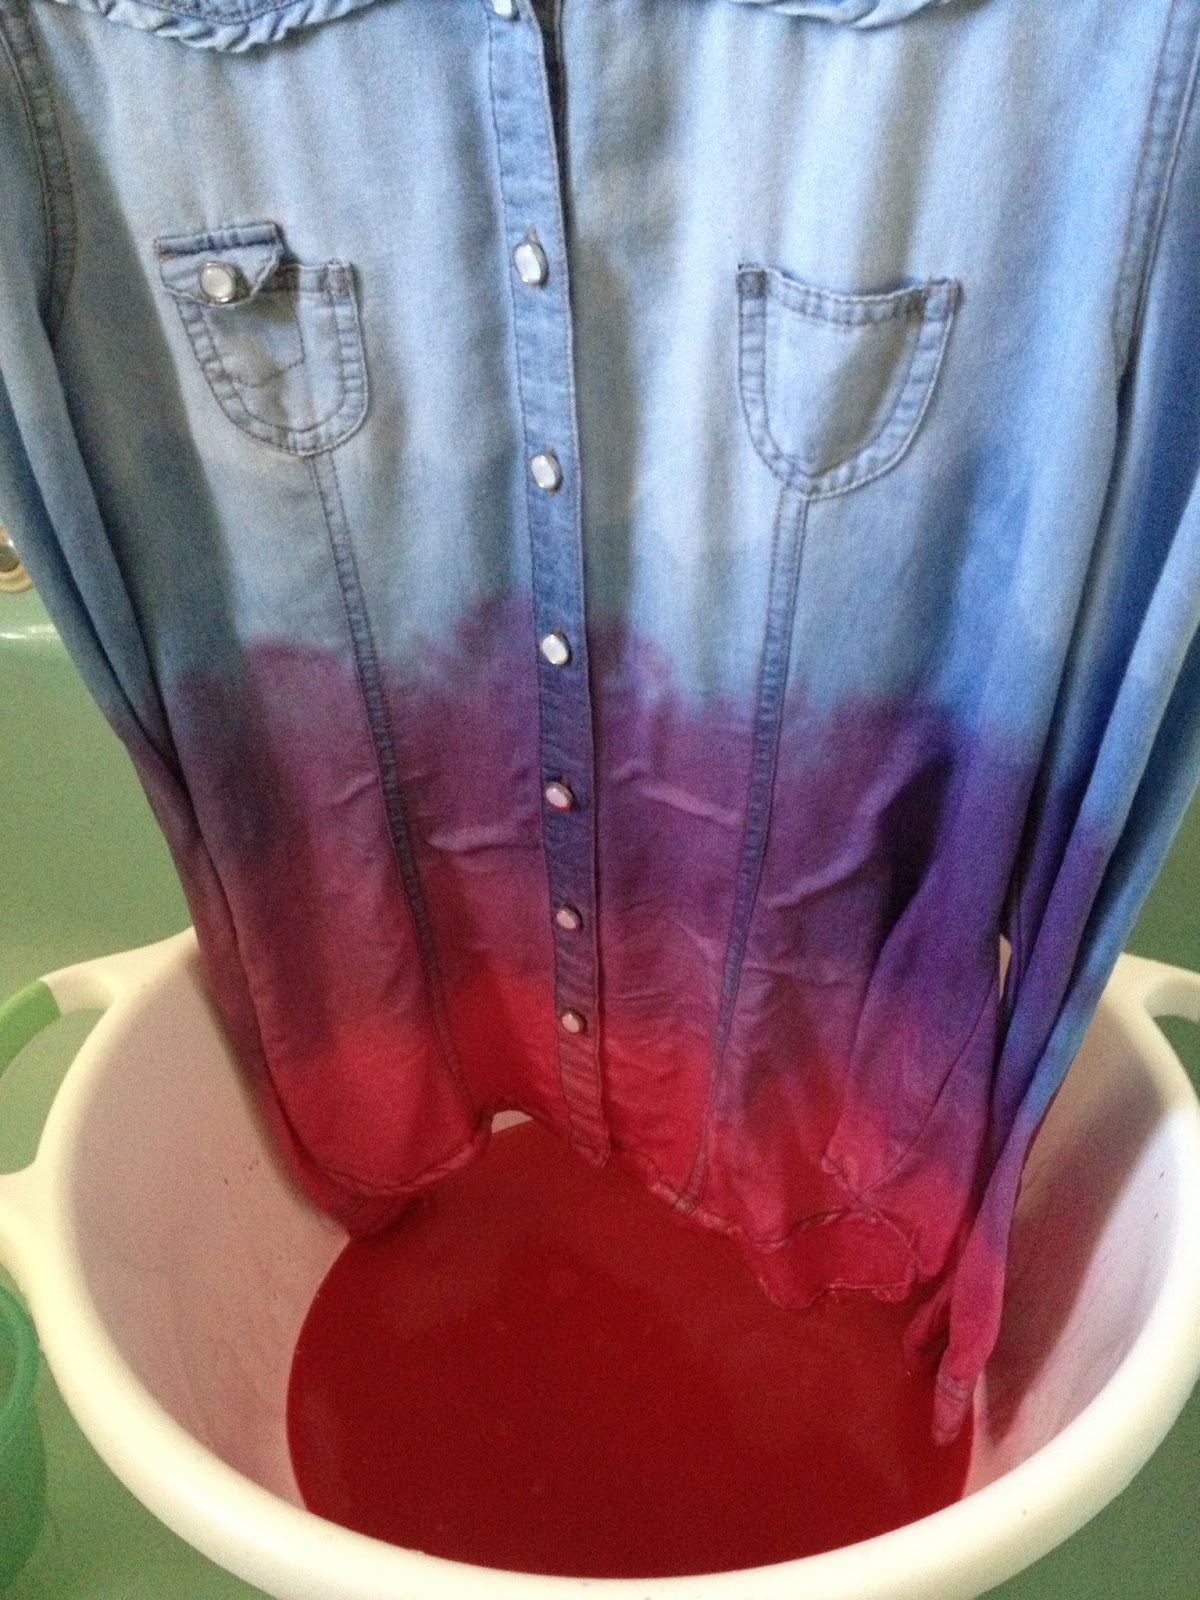
Context needed now, more than ever; if anybody walked in, they'd have thought we were massacring someone. After 45 minutes, remove the jacket from the dye and hang so that the dye seeps downwards. Do NOT wash with water. Not yet, anyway.

We used a glazing brush to darken the hemlines a bit more. I guess you can say it's chicken glazing days are over.

After the jacket's soaked up the dye and dried, I recommend leaving it in some fabric softener solution because the entire dyeing process leaves the fabric a little stiff.

Drum roll, please...presenting the finished product! It didn't really turn out maroon but instead, to rather dirty pink.

And that concludes my first DIY post. I hope you found it helpful!
PS: Special thanks to my mother, who actually did all the work while I sat on the toilet seat, gawking and taking pictures.

Subscribe to:
Posts (Atom)